Back to swarf page...
Stencil Printer for Rework
So
I needed to install a funky thing on a funky board that was already
partially assembled. Typically no big deal but this part was silly - an
SMT PCB module with parts already soldered on to it. Like WTF,
Over? I really hate those, but typically they use castellated PCB's
that are easily hand soldered. But no, these clowns used some whacky
SMT ball things like the ones TI uses on some power supplies. I've done
a lot of PCB design, and whenever any client has used these power
modules that come in either a thru hole or funky SMT, the client always
wants thru hole.
So this thing has a heavy part on the
bottom... a BGA no less. Again WTF, Over? I guess some CM's can
handle this... but I've talked to a few and they hate theses things as much as I do. And
it easily could have been made thru hole by just NOT placing the silly
ball things, but no it's too much work to NOT place something (I'm not
getting this).
So it go me to thinking that I need to come up
with some way to handle SMT rework stencils on PCB's that already have a
shit ton of parts installed. No way to use a CM's stencil printer or
the typical homebrew method that uses painters tape and a square.
You need to use a custom small ass stencil and get down between what's
already there, apply paste, and get the fuck out vertically to give
good definition to the paste on the pads.
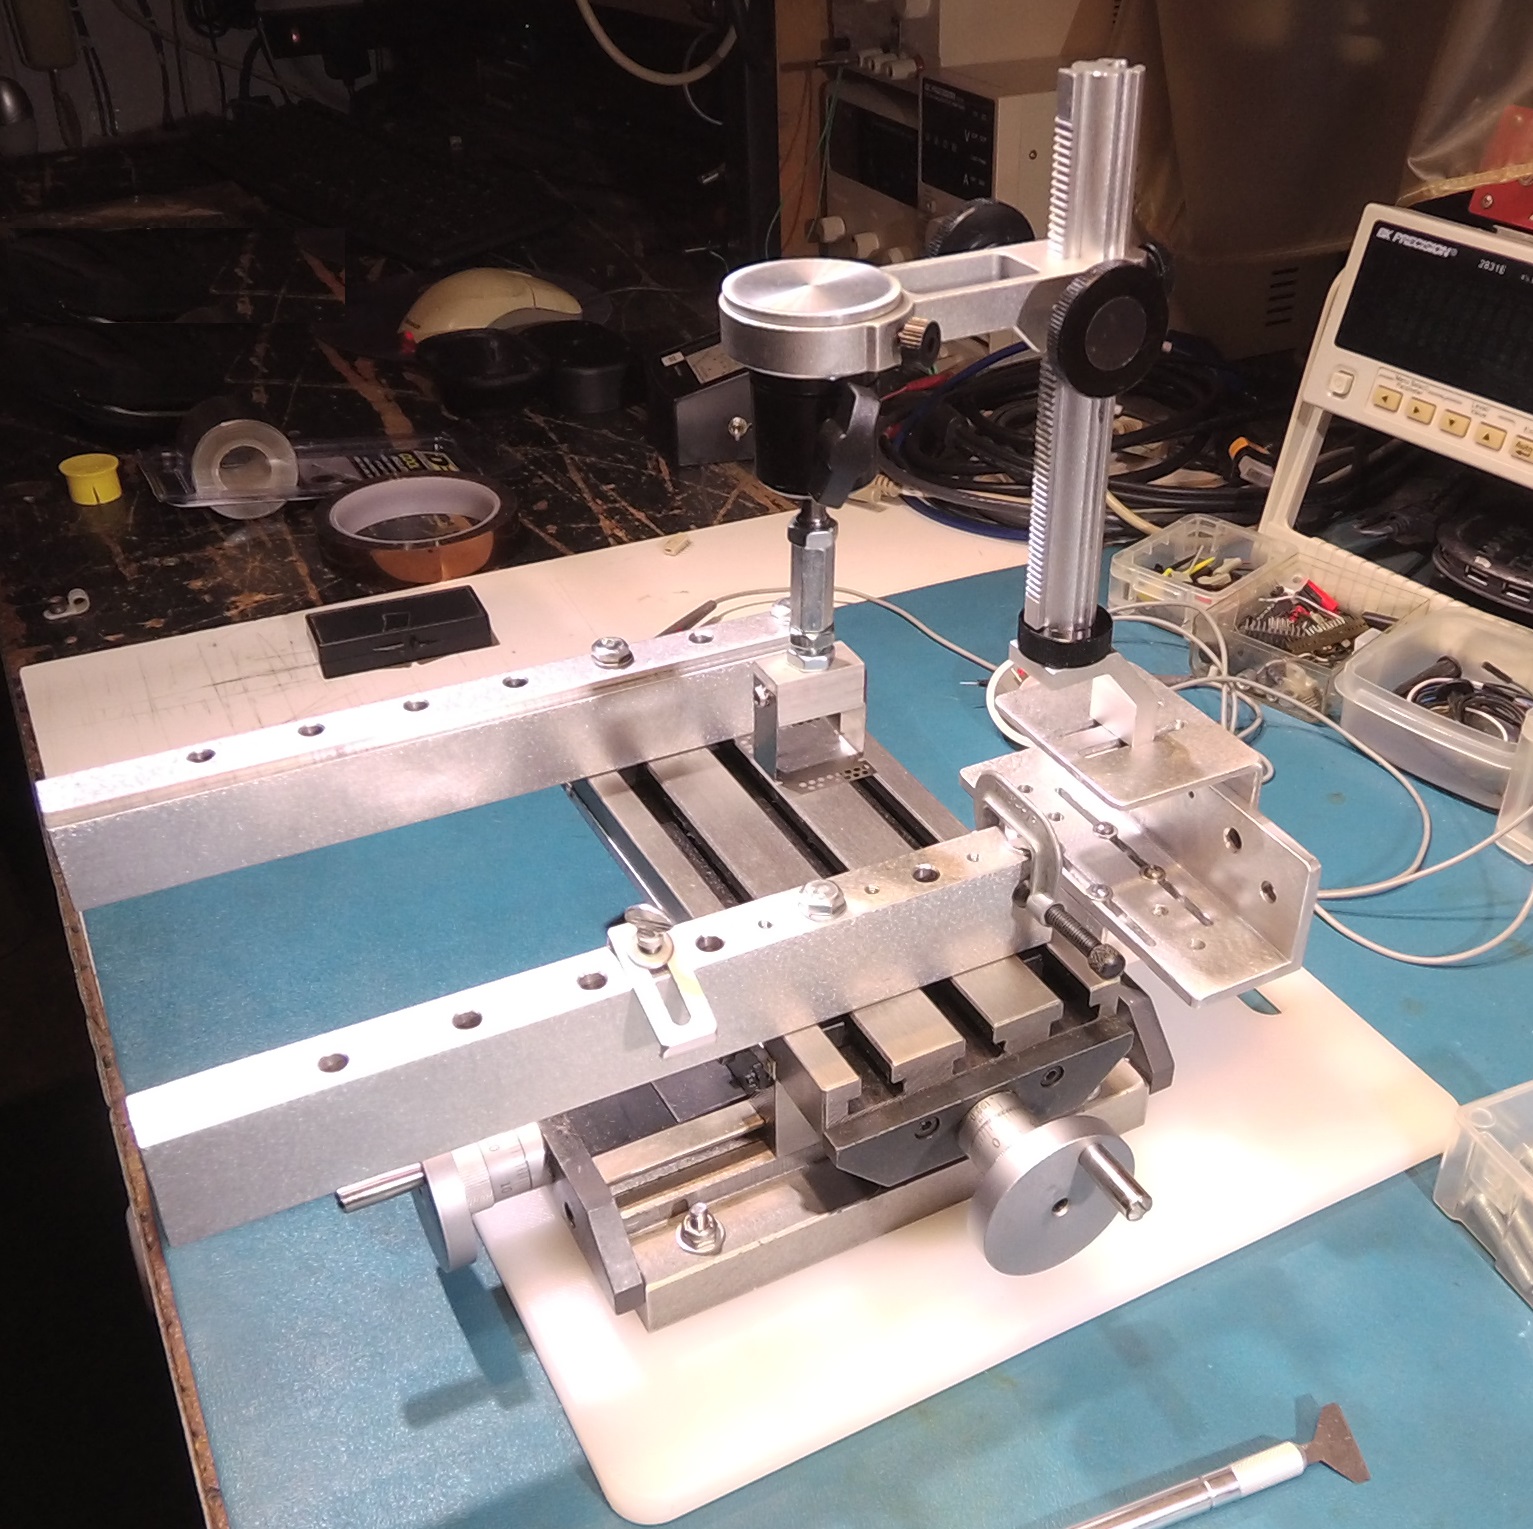
So this is what I
came up with - an X-Y table from Little Machine Shop, a microscope
camera holder, and some custom machined other stuff. I had to add gibs
to the holder where it rides on the column - too much play in the
azimuth. The C-Clamp is a stop for repeatable insertion (everyone likes
repeatable insertions). The two large bars are dovetailed to hold upto
a 1/8" PCB. I used a camera ball swivel to allow for alignment.
Silly I tell you...

Back to swarf page...